Here is the step by step guide on how I created and animated my 3D head. It will detail how I set up my reference images, modelled my head and other parts of the scene, unwrapped and textures all the models, how I rigged my animation and how I animated my model.
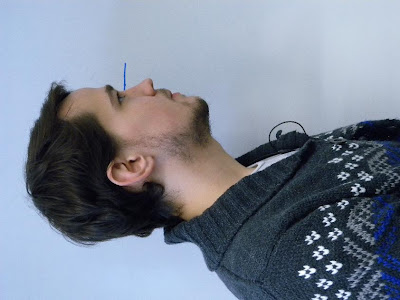
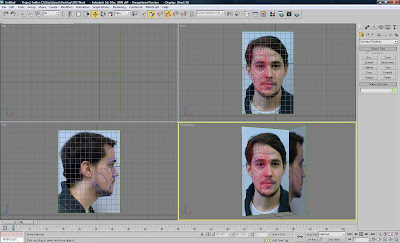
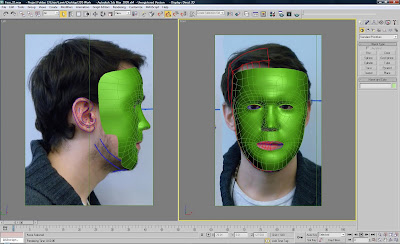
Stage 1: Setting up my reference imagesFirstly, I had an photo of my face from the front and left side.
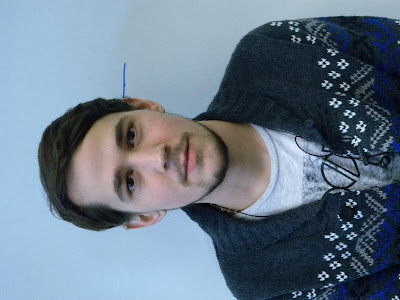
The next step was to then adjust the images in Photoshop CS4 to make them suitable as reference planes in 3DS Max.
I used the Lens Correction feature in Photoshop CS4 to skew the images and remove any barrel distortion.
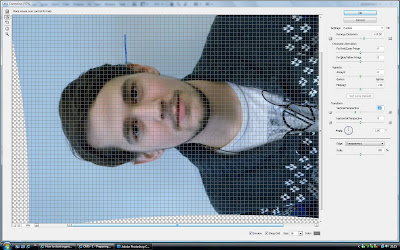
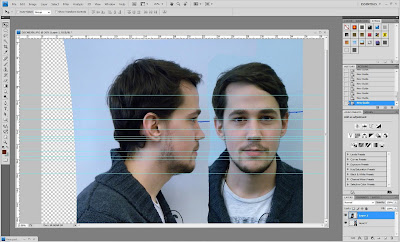
I then placed the images next to each other and used rulers on multiple points to line up the images.
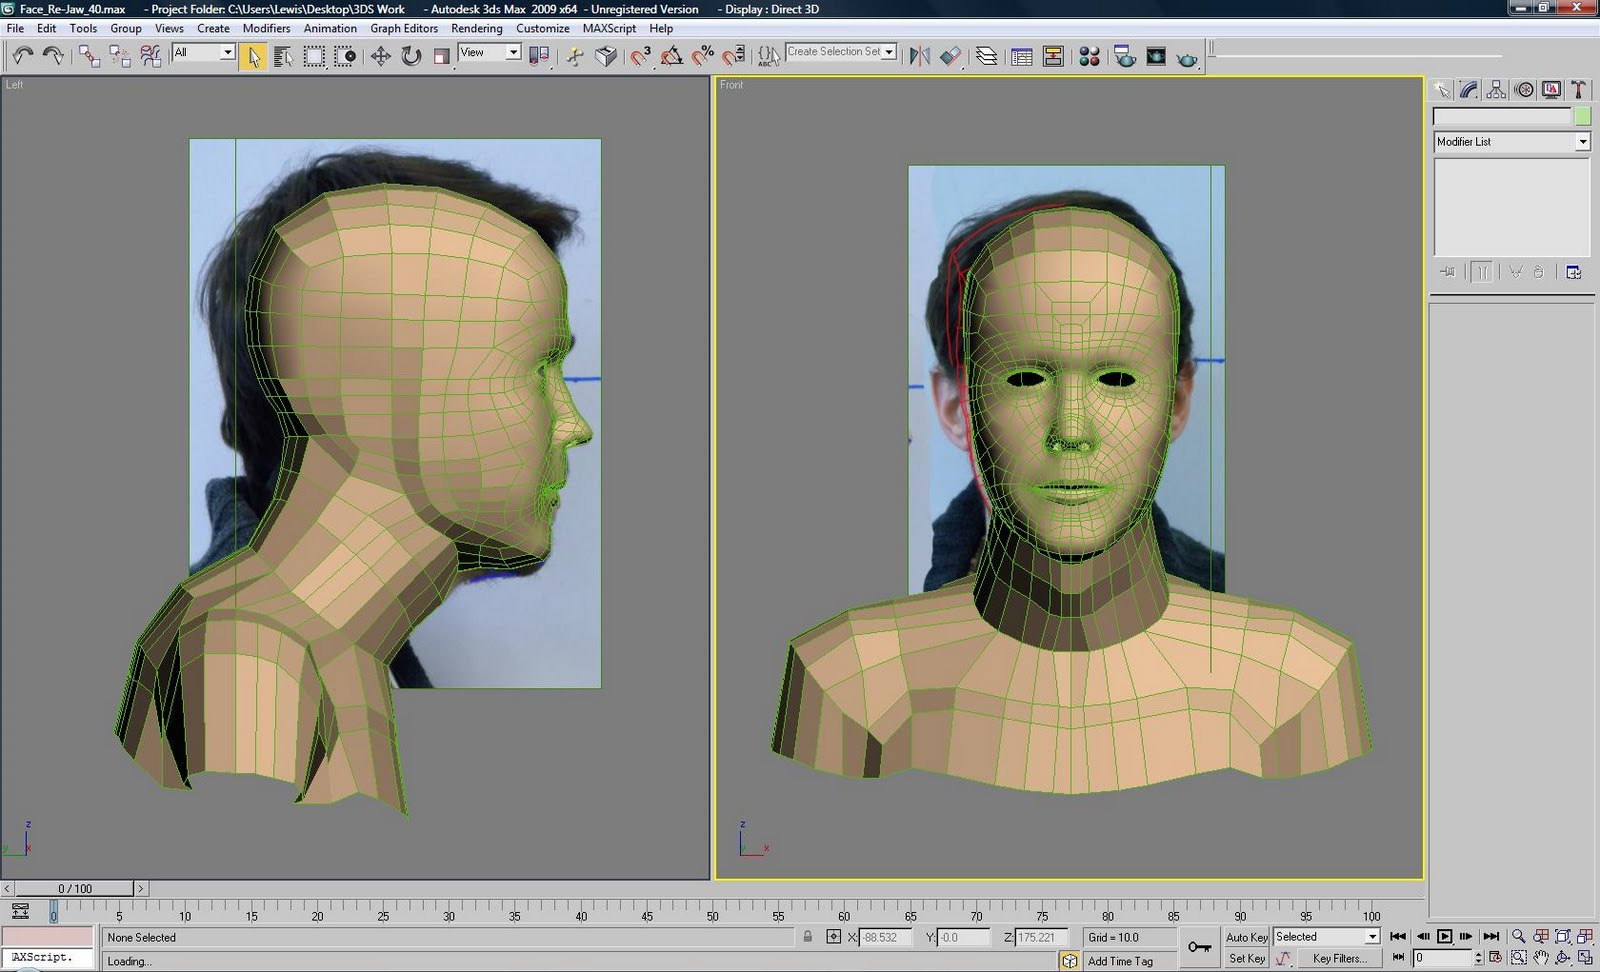
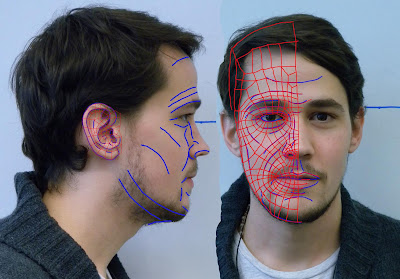
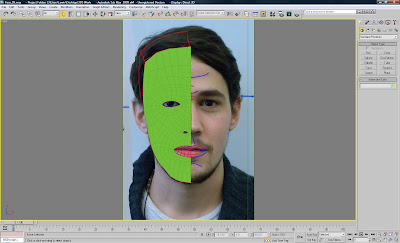
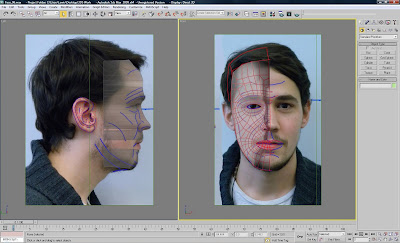
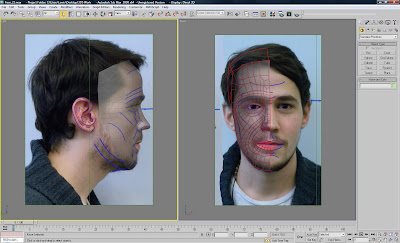
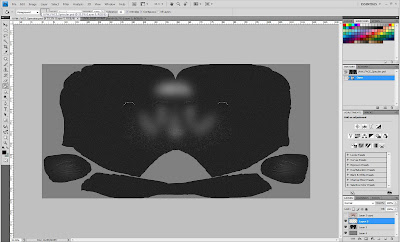
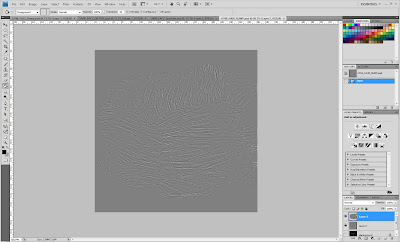
I then proceeded to the blue brush to highlight the wrinkles and features of my face and the red brush to draw on the topology. This was done roughly because I knew when modelling my face I would most likely have to deviate from the topology.
Finally I created two planes in 3DS Max. The reference image was then placed on both these planes. I then moved the two planes into position so that the left side of my head could be viewed from the left viewport and the front of my head could be viewed from the front viewport.
I was then ready to start modelling my head.
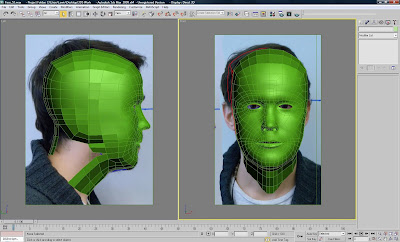
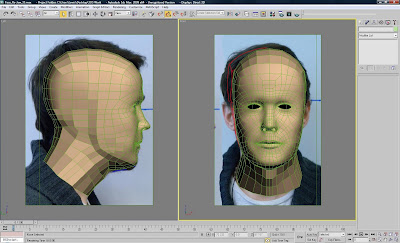
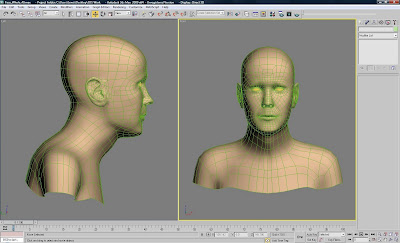
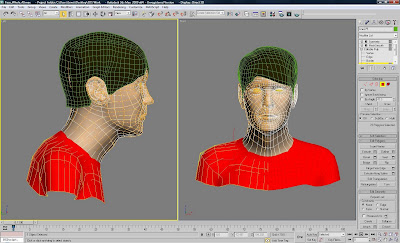
Stage 2: Modelling the HeadUsing the line tool in 3DS Max I started to create a series of quads covering the topology i drew on my reference images.
I then took one of the quads, changed it into an editable poly and attached it to all the other quads.
I then proceeded to pull each of the vertices out in the left view to line up with the main features of my face.
I continued this process until all the vertices of my original quads formed a rough model of my face.
I then added a symmetry and mesh smooth modifier to my face so whilst modelling I could toggle them on to see the final effect. I chose a mesh smooth over a turbosmooth to keep the poly count low.
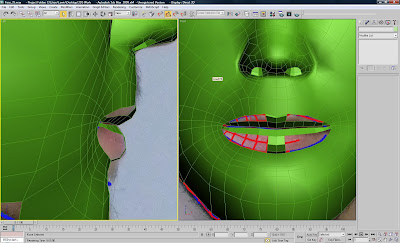
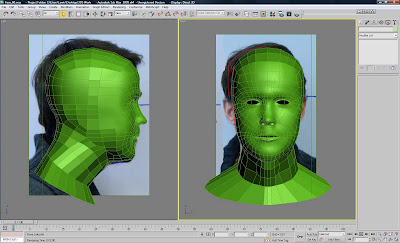
The next step i took was to extrude the polys around the mouth outwards, tweaking the vertices in the front and left viewports, to form the lips.
I then strated to extrude the polys around the jaw to form the chin.
I then started to extrude the polys around the top of the face to form the top and back fo the head.
I then joined the polys around the jaw to those of the back of the head. I also started tweaking the vertices on the head to form a more realistic skull. I then started to extrude the polys around the chin downwards to form the neck.
The polys from the front of the neck were then joined with polys extruded down from the skull to form the neck.
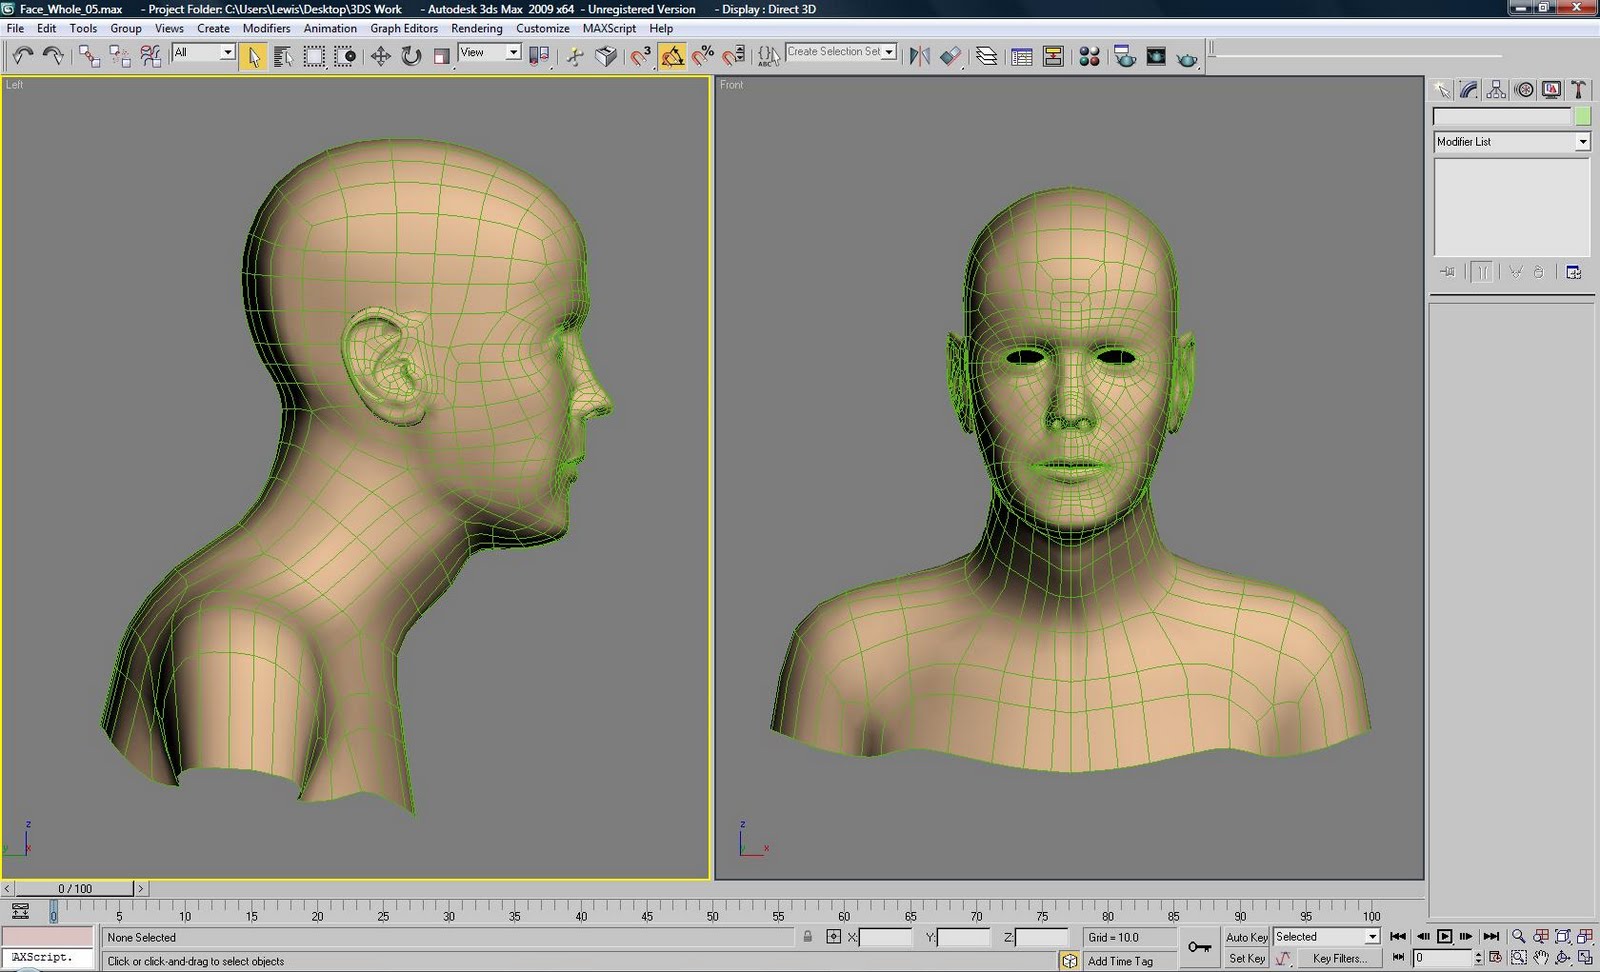
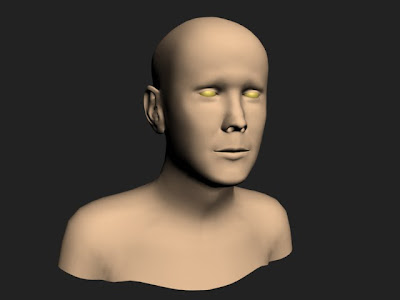
I then added a more realistic colour to the head to give myself a better idea of how the final model will look. I also spent a while tweaking vertices to make the face of the model look more like my own.
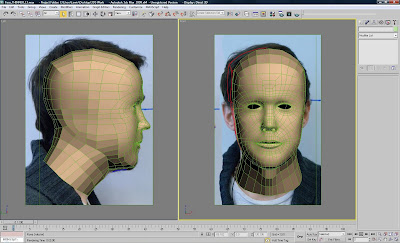
After viewing the model when smoothed, I realised that the jawline of my model was not correct. The neck seemed to slow too smoothly into the chin with no difinition on the jawline. I then proceeded to delete a number of the quads around the jaw and redesign the topology.
When remodelling the jaw, I made sure that the new topology followed the jawline. I could then pull the verts of the parallel edges inwards to form the definition to make the jawline visible. I also pulled the vertices that would be just behind the ear inwards to create a more realistically flowing head. I also defined the area around the throat to form the cricoid cartilage.
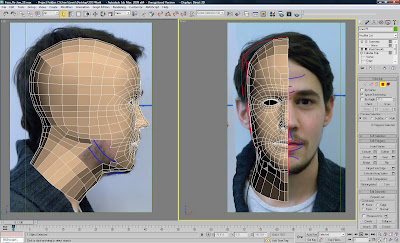
I then started to create the chest and shoulders by extruding the polys downwards from around the neck.
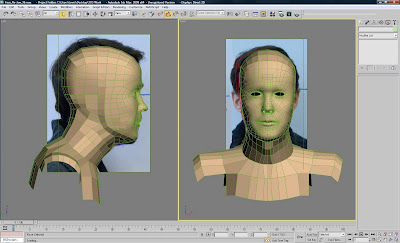
I then thinned the jawbone and extruded the polys from the shoulders and chest downwards to form the rest of the body.
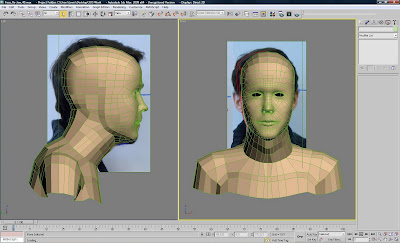
This complets the first stage for modelling the head.
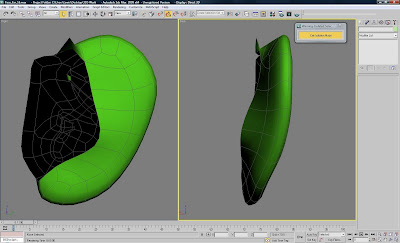
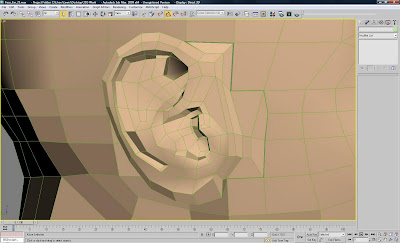
Stage 3: Modelling the EarI started to model the ear in the same way I did my head. Using the line tool I created a series of quads covering the topology i drew around the ear on my reference image.
I then took one of the quads, changed it into an editable poly and attached it to all the other quads.
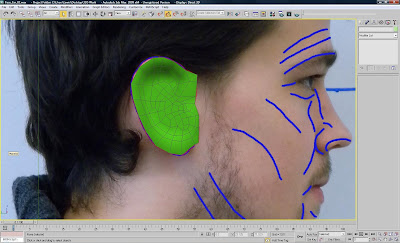
I then proceeded to pull each of the vertices out in the left view to line up with the main features of my ear.
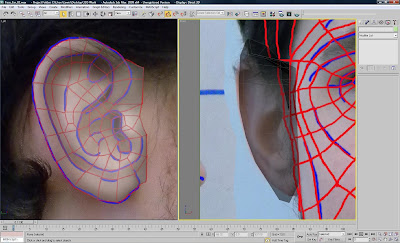
I continued this process until all the vertices of my original quads formed a rough model of my ear. I also added a mesh smooth modifier so I could begin to see how the final ear model would look.
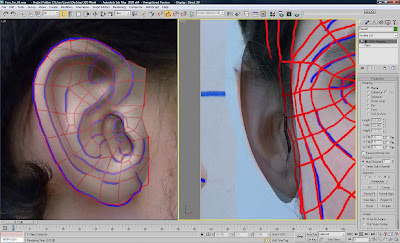
I then used the inset tool in editable poly to create more topology. I then tweaked the vertices of the new topology to create the fine detail of the ear.

I then started to extrude the polys around the edge of the ear backwards to form the back of the ear.
The polys around the back and edge of the ear where then extruded outwards to match up with a gap I had created in the model of my head.
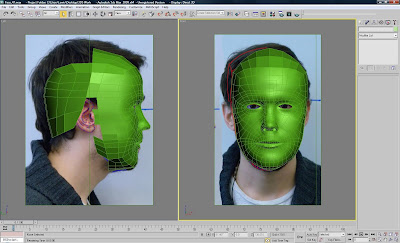
I was then in a position to attach the ear to the head.
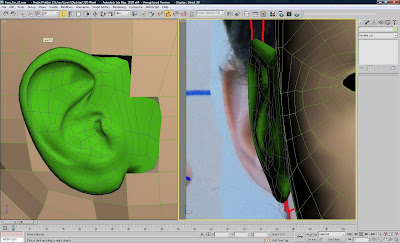
Stage 4: Attaching the Ear to the HeadTo attach the ear the the head, I first attached the ear model to the head model. I then started to line up the vertices and make sure that the edges would flow into each other without causing any three of five sided polys.
I finally welded all the vertices together. This attached the ear to the head.
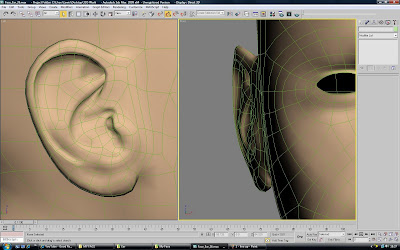
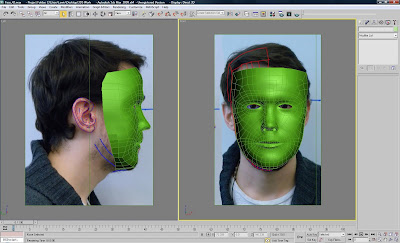
The head was now near completion and only required a few finishing touches.
Stage 5: Finishing the HeadI spent a long time tweaking the vertices in the left and front viewports to make the model look more like my head.

To create the eye, I made two identical spheres and positioned them behinf the eye sockets.
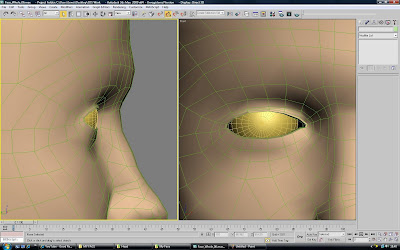
I then proceeded to take the vertices around the eye and fit them to the eyeball so there was no gaps. I also extruded the polys in the inside corner of the eye to form the tear duct.

Using the cut tool in editable poly, I then created some new geometry above the eyelid and tweaked the vertices to create the folds I have above my own eyelids.
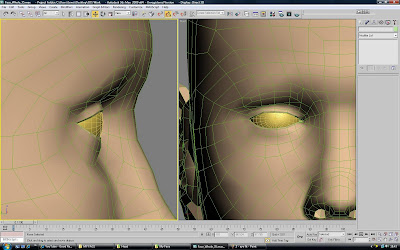
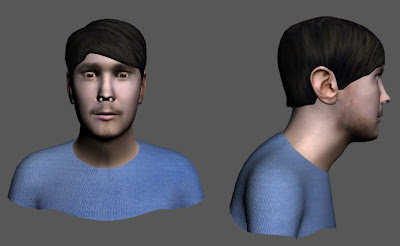
After a bit more tweaking I had completed the model of my head.
I was now ready to start modelling other parts to my head.
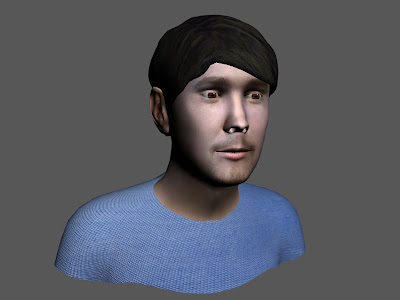
Stage 6: Modelling the HairTo model my hair I created a plane which i positioned over my head. After changing the plane to an editable poly, I started extruding the plane in different directions, tweaking the vertices in all the viewports as I went. I did this until I had formed a model wich was rough and covered my head.
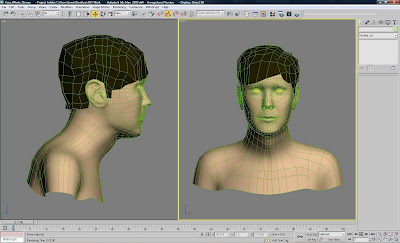
I then realised that I had modelled the hair backwards to how I wear mine. This was because I am used to seeing my hair in the mirror and it seemed more natural. T added a symmetry modifier, collapsed it to the model and deleted the original mode leaving the reflected hair which I positioned over the head. I then added a turbosmooth modifier.

This completed my hair model.
Stage 7: Modelling the TeethTo create the teeth for my model I started by creating a box, turning that box to an editable poly, adding a turbosmooth modifier to the box and then collapsinf the modifier to the model. I then copied the box to the same object multiple times, tweaked the vertices and positioned each box multiple times to form the different teeth.
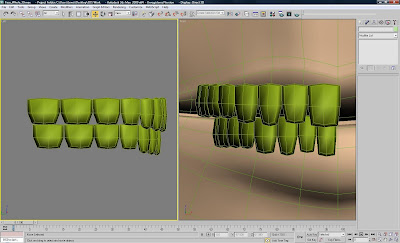
This completed my teeth model.
Stage 8: Modelling the ShirtTo create the shirt for my model I started by selecting all the polys of my models chest and shoulders. I then used the scale tool and created a larger, new object.
I then converted the new model into an editable poly, relaxed it and added a mesh smooth modifier.

This completed my shirt model.
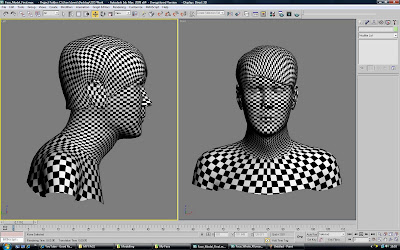
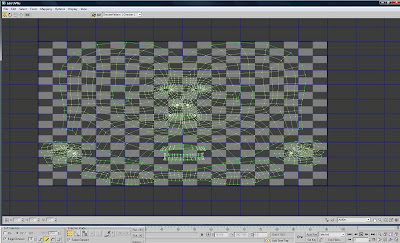
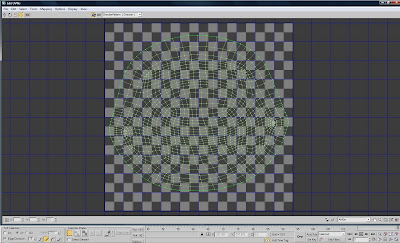
Stage 9: Unwraping and TexturingTo unwrap and texture my model, I used a UVW Unwrap modifier. By applying a chequer pattern to each model I could see where the texture would stretch. Relaxing the vertices in the UVW Unwrap modifier would stop the texture from stretching.
For the head I used a cylindrical map for the head and a pelt map for the ear. The pelt map on the ear worked really well and allowed me to texture the ear with high detail.
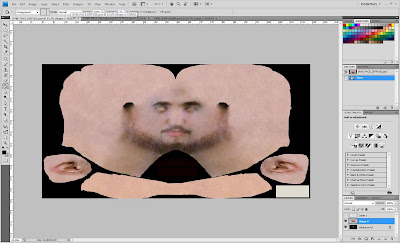
I then rendered the UVW Unwrap and imported the image into Photoshop CS4. Using my original reference images I started to copy and paste parts of my face images ontop of my UVW render, matching the feature of my model, to create a texture map of my face. I then used the patch tool and the spot healing brush to make a smooth complete texture map of my head to be used as a diffuse map.
I then took the diffuse map of my head, desaturated the image and added a high-pass filter. This was then used for a bump map. I added a noise modifier along with this image to make a more detailed bump map.
I took the diffise map once more and used it to create an image what would be used as a specular map for my head. Once I added this, I tweaked the specular and gloss levels to make my head look more realistic.
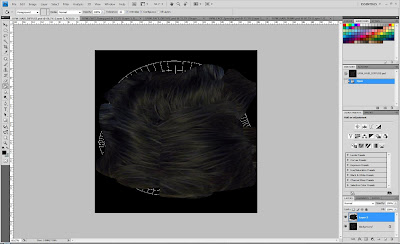
For the hair I used a pelt map. The pelt map worked really well on the hair and made for creating a hair texture map very easliy.
I then rendered the UVW Unwrap and imported the image into Photoshop CS4. Using my original reference images I started to copy and paste parts of my hair from my face images ontop of my UVW render to create a texture map of my hair. I then used the patch tool and the spot healing brush to make a smooth complete texture map of my hair to be used as a diffuse map
I then took the diffuse map of my hair, desaturated the image and added a high-pass filter. This was then used for a bump map.
For my eyes I made a texture from images of my own eyes and for the shirt I used a texture that I found on the internet. I added a bump map to the shirt to make the texture seem more realistic.
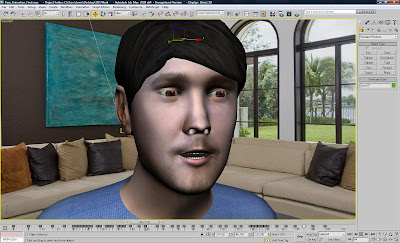
After I had added the textures, this completed the model of my 3D head.
 Stage 10: Rigging and Animation
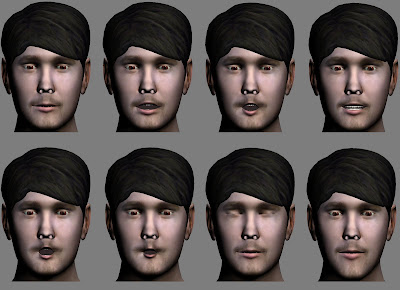
To begin rigging my animation I made seven copies of my head model. In each of these models I tweaked the vertices around the mouth to mimic a different phenetic sound and positioned the teeth accordingly. I also tweaked the vertices around the eyes on a model as a blink and the vertices around the jaw of a model for mimicing an open mouth. I then added a morpher modifier to the original model and referenced each new model. I could then set the values for my model to make that shape.
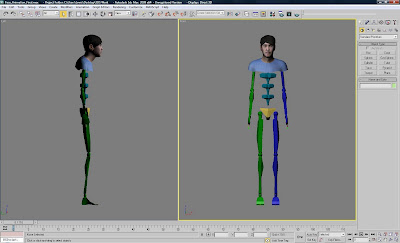
I then created a biped and positioned it inside the body and head of my model. I then added a skin modifier and weighted the vertices accordingly so to accurately mimic head and neck motion.
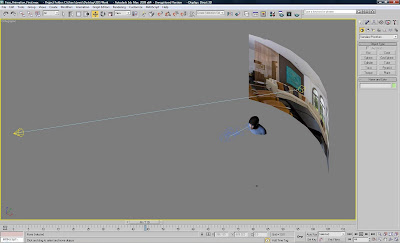
I then added a plane behing the model with a bend modifier. Adding a picture of a room made the model appear as though being inside. I also added a camera and some lighting.
This completed the rigging for my animation and I was now ready to start animating.
I recorded myself saying "Hello, I'm Lewis Schaefer and this is my 3D head." which I then imported into 3DS Max. I then changed the values on all the instances of my morpher modifier, copying the sounds of my voice. I also added two blinks and jaw movement. I did this whilst un autokey which recorded my animation.
Finally, In autokey I animated the head moving about.
This completed my animation for my 3D head.